Building your own calculator

I've been slowly teaching myself to solder and build simple electronics for about two years now. I especially like kit projects -- they're fun to make, give me a chance to hone my skills, and I usually end up with something neat at the end. Last week, I ordered one of SpikenzieLabs' Calculator Kits from Adafruit to replace our lost calculator at home. Now, I know that every smartphone under the sun has a calculator, but sometimes it's nice to be able to press physical buttons! Plus, you get the gratification of being able to say you built something yourself.
As with any kit project you get all the parts, but none of the tools! If you want to get in to soldering and kit electronics, I'd recommend picking up a few things first:
- A soldering iron - start with a really basic XY-258 and stand, then upgrade to something nicer later if you really get in to it!
- Solder (there are a few different kinds; I use this thin lead-free stuff for most of my projects)
- A set of flush diagonal cutters to snip the ends off of pins and such after you solder them -- it looks nicer, and the ends won't catch on stuff!
- A solder sucker, in case you mess up (you will!)
You could also opt for Adafruit's Learn to Solder pack, which includes everything I mentioned above, a light painting kit, a phone charging kit, and a tiny computer called a microcontroller to play with.
Ok, now on to the calculator!
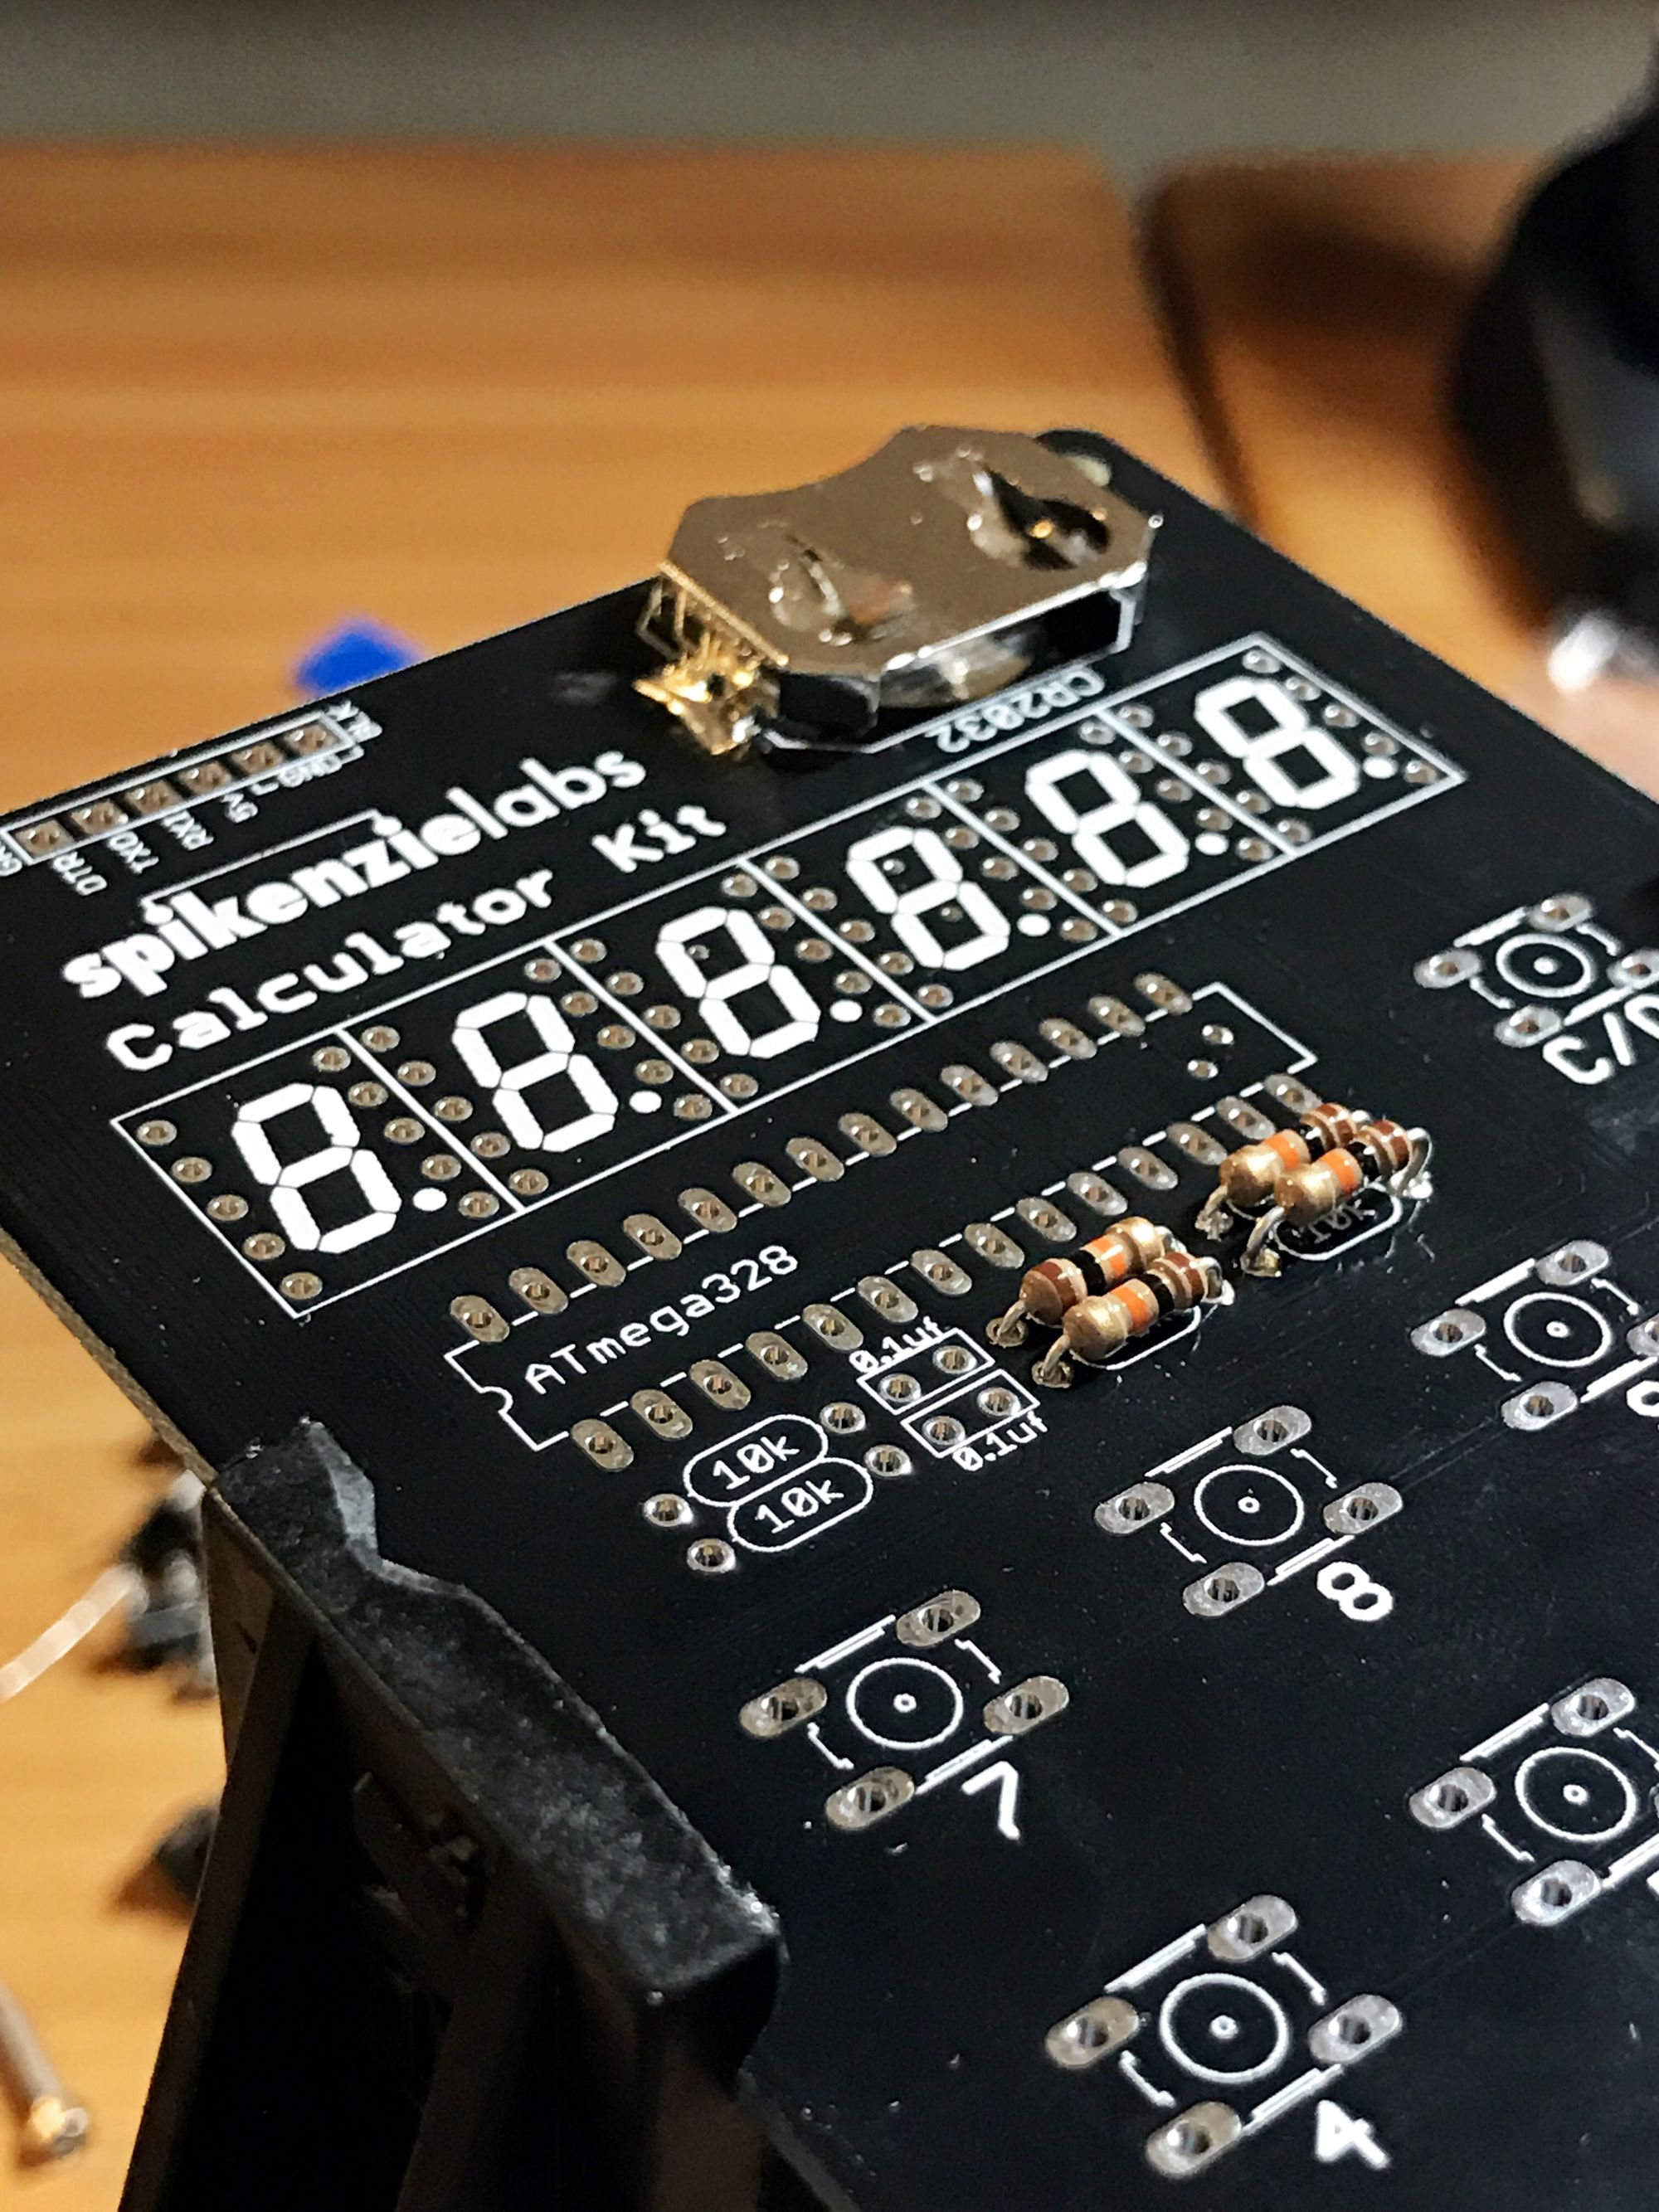
 The printed circuit board (PCB) is labelled really well; if there's something you need to install and solder, it's printed right there on the board for you. I've got the battery holder in the upper right and a few resistors (the little cylinders with the colored lines) soldered in.
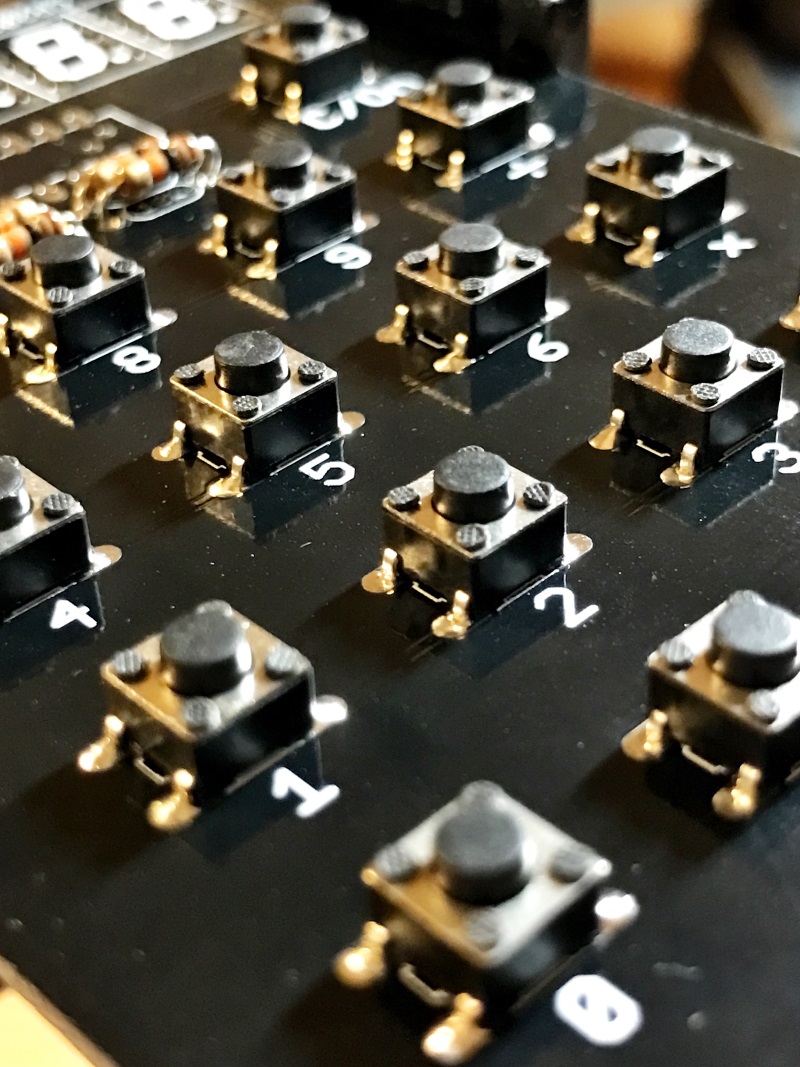 Time to snap all of the buttons in! The nice thing about these buttons is that they'll actually stay in place when we flip the board over to do our soldering. For things like the resistors, you usually want to bend the wires at a 45 degree angle (thanks Adafruit!) so they'll stay put.
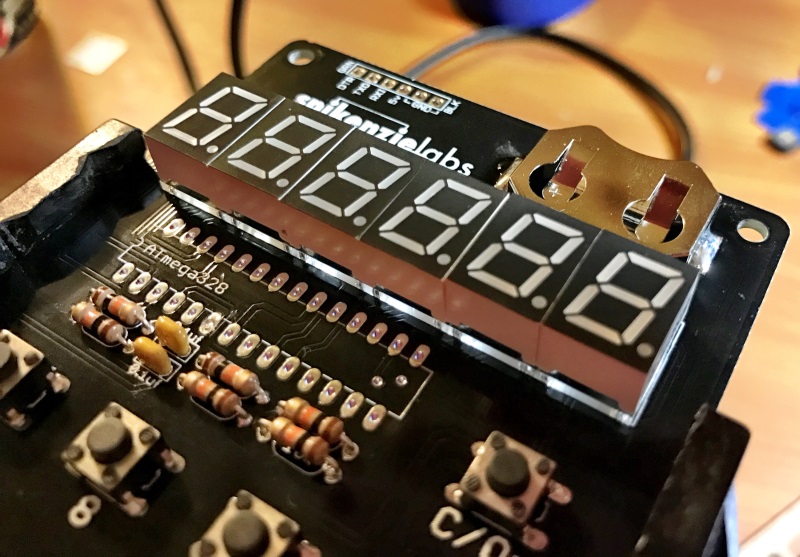 Now we need to get the displays for the numbers installed. There are six of them, each with ten pins that go through the board. It's a little tricky to get them inserted, since the pins have to line up perfectly. These were the first parts I installed where I had to use painter's tape to hold them in place; the pins are too short to bend and the displays will just fall out if you flip the board over!
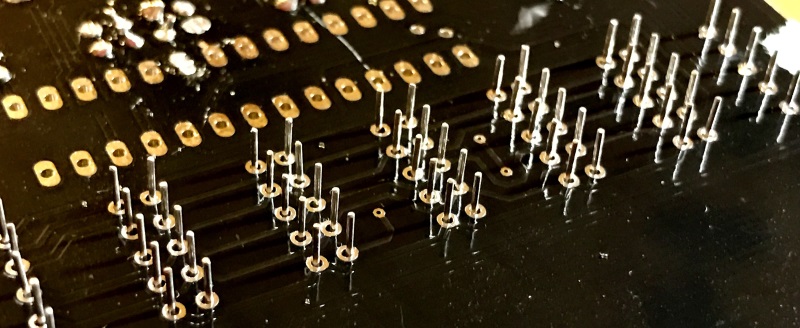 And here's the underside of the board for the first time! Those clusters of ten pins are for the displays we just installed. You can see a great example of bad soldering in the back left of the image; too much solder on the pins on the far left! I also spilled molten solder on one of the holes for the microprocessor...which I'll have to clean up later.
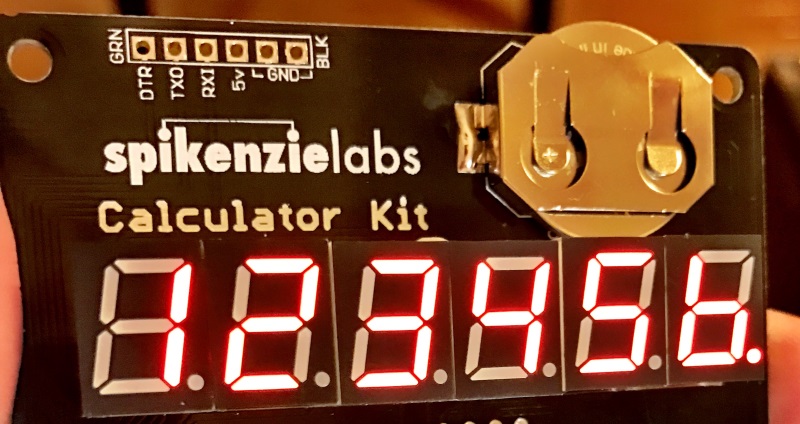 Woo! It works! Professional tip: always make sure the thing you built works before you put it in a case.
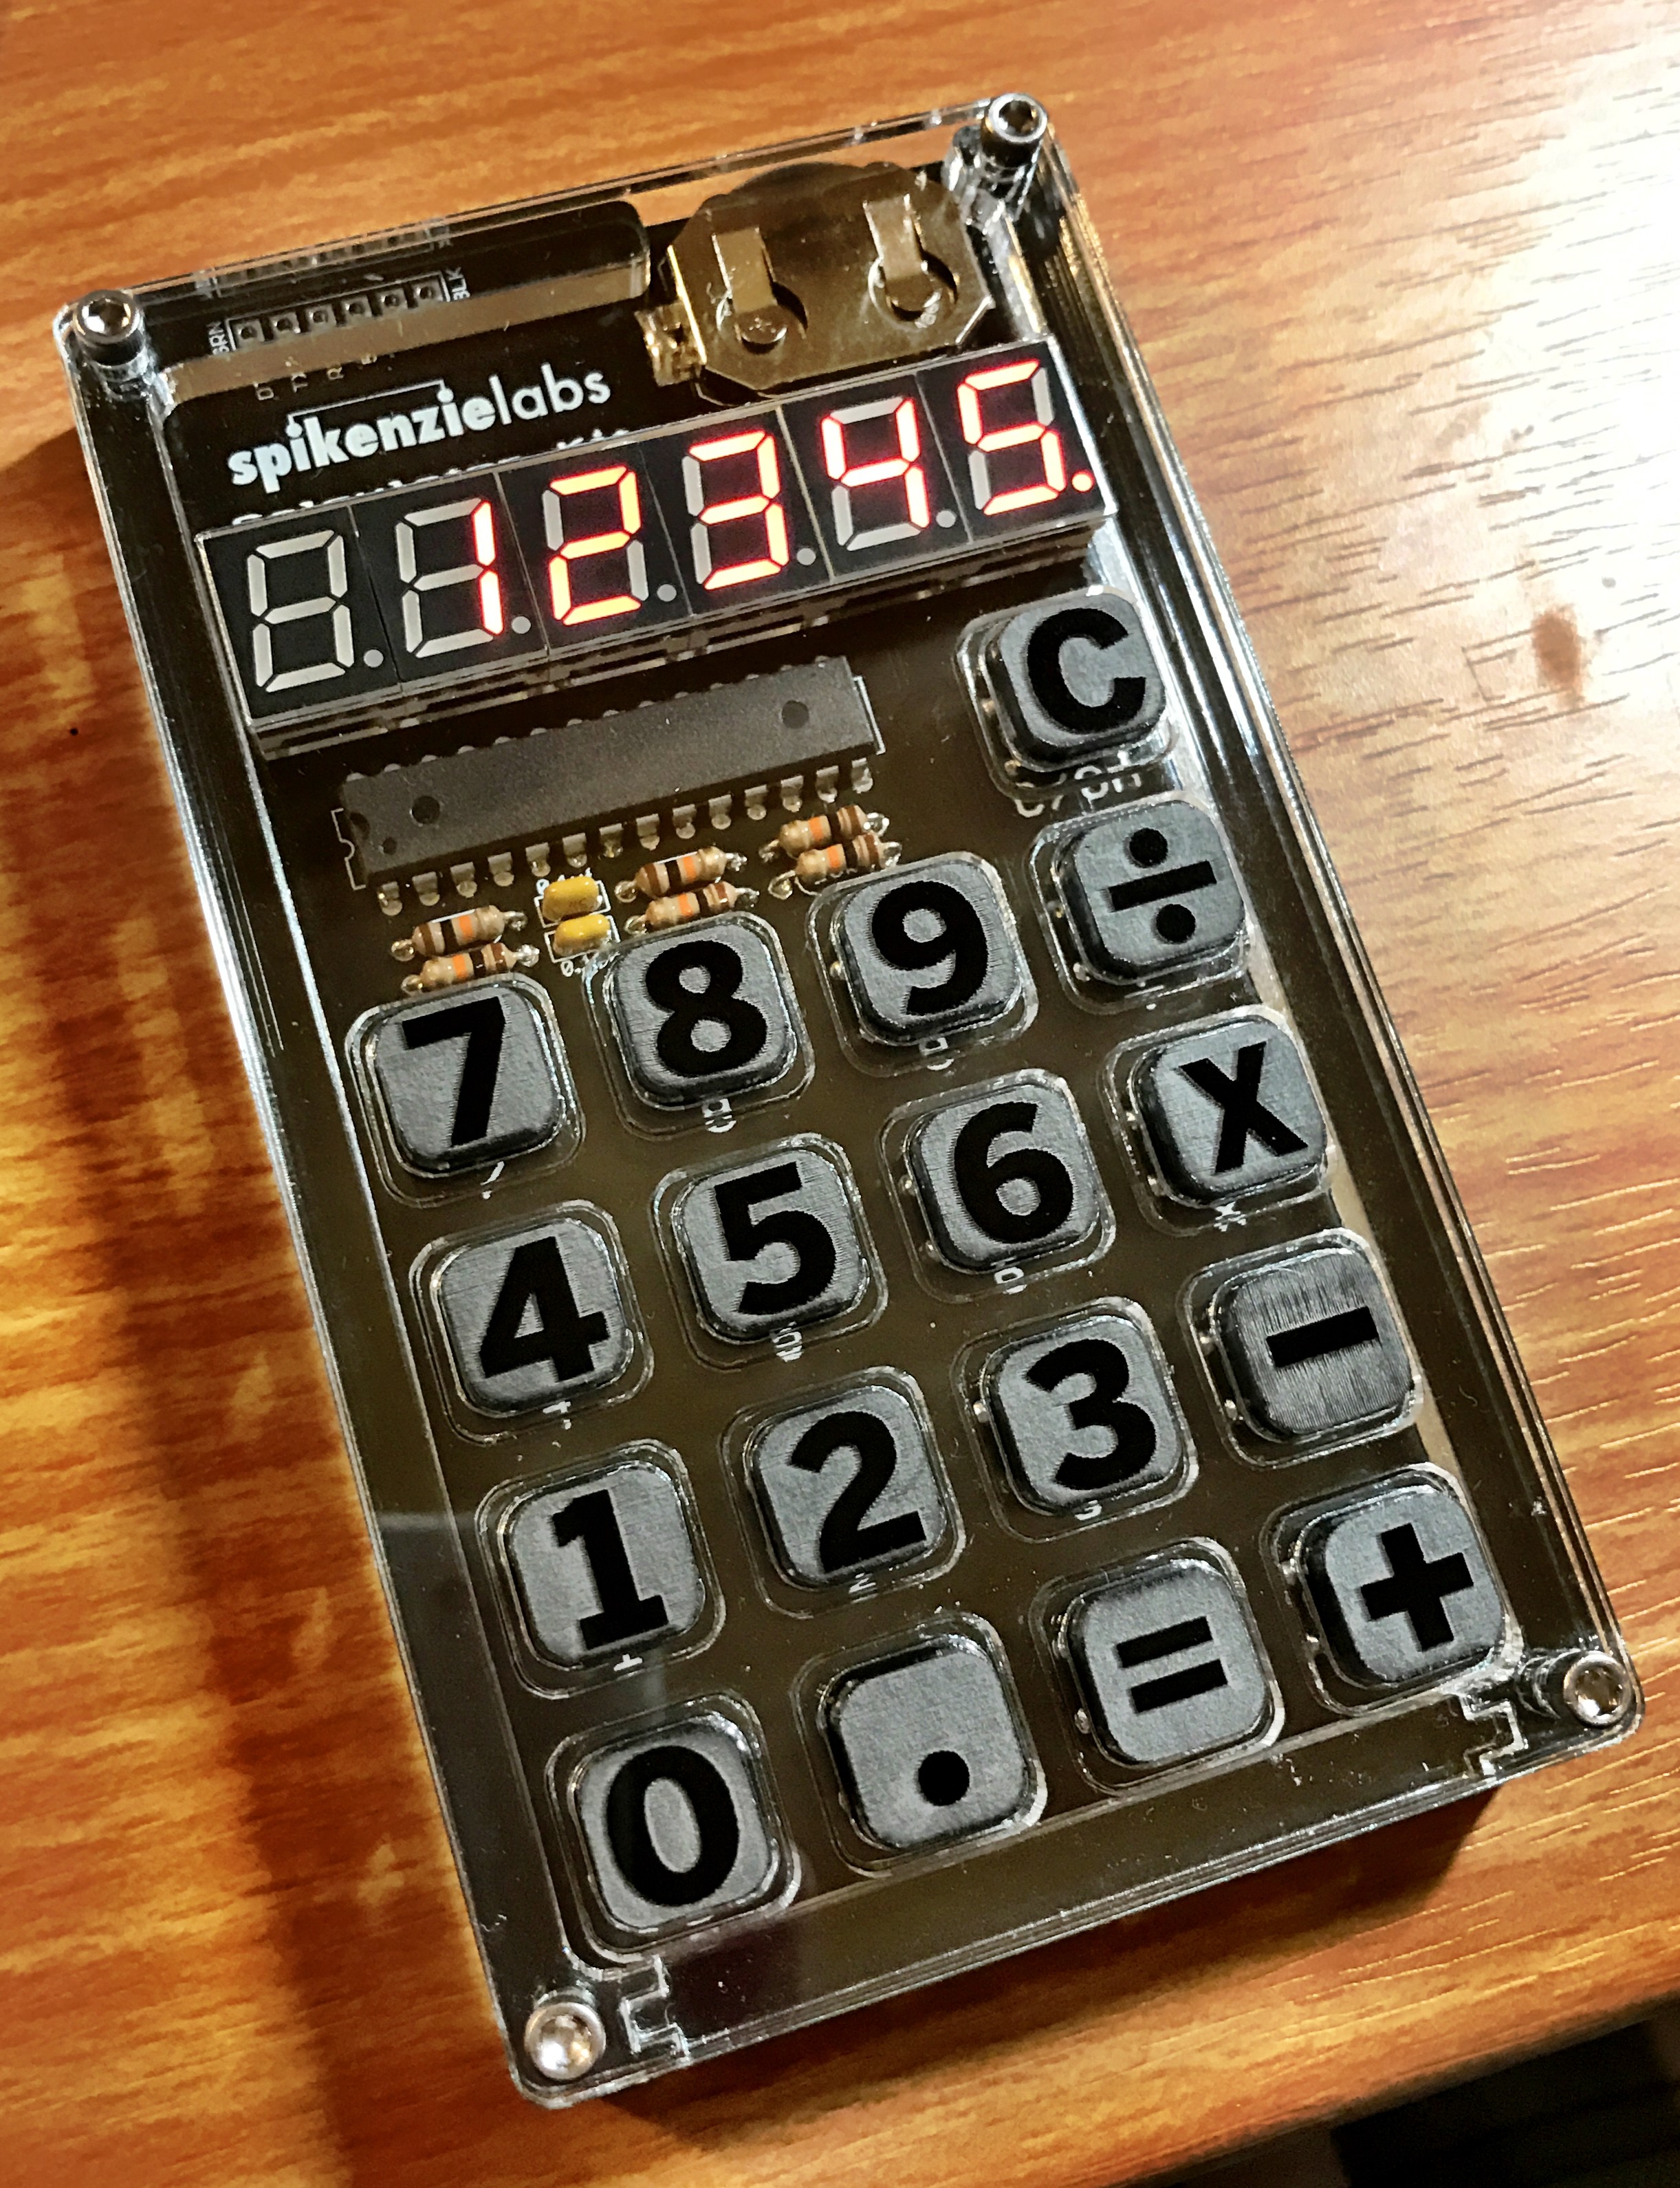 And here's the finished calculator after we've cased it in acrylic and put all of the buttons on! Be careful with acrylic - it looks cool, but it's pretty brittle and scratches easily!
This is a fun kit; a little more advanced than something like Adafruit's MintyBoost charger, but not too tricky! Plus, you get a really cool calculator out of the deal!