Constructing an AIS Receiver with a Raspberry Pi 3

Special thanks to Wegmatt LLC. for producing the dAISy AIS receiver, Stripydog (the makers of kplex), Matt Brown at m/v C:\ESC, Terry, and Freek Van Koolbergen for your documentation, tutorials, and comments -- I couldn't have done this without you! Last updated on September 27, 2017.
My wife Katt went on a cruise with her mom to the Caribbean this spring, which sparked a few questions in my head: how are ships located when they're out at sea? Is there some kind of system that they all use to communicate location data? A few Google searches and Wikipedia articles later, I discovered the Automated Identification System. A few sites like Marine Traffic specialize in aggregating this information across the entire world, and there's always a need for better coverage. I thought to myself "Ooh! What can I do to help out?" and quickly discovered that dedicated AIS receiver hardware can be pretty expensive -- anywhere from $200 to $500!
Armed with a Raspberry Pi 3 and just enough knowledge to be dangerous, I set out to build my own standalone receiver. I knew that I would need a USB-based AIS receiver, a VHF antenna, power supply, and some way to take the AIS traffic stream and send it to an aggregator. This post is a summary of what I learned, and how to set up your own receiver for around $100.
Bill of Materials
- Raspberry Pi 3 ($35 on Amazon)
- A 4GB or larger micro SD card
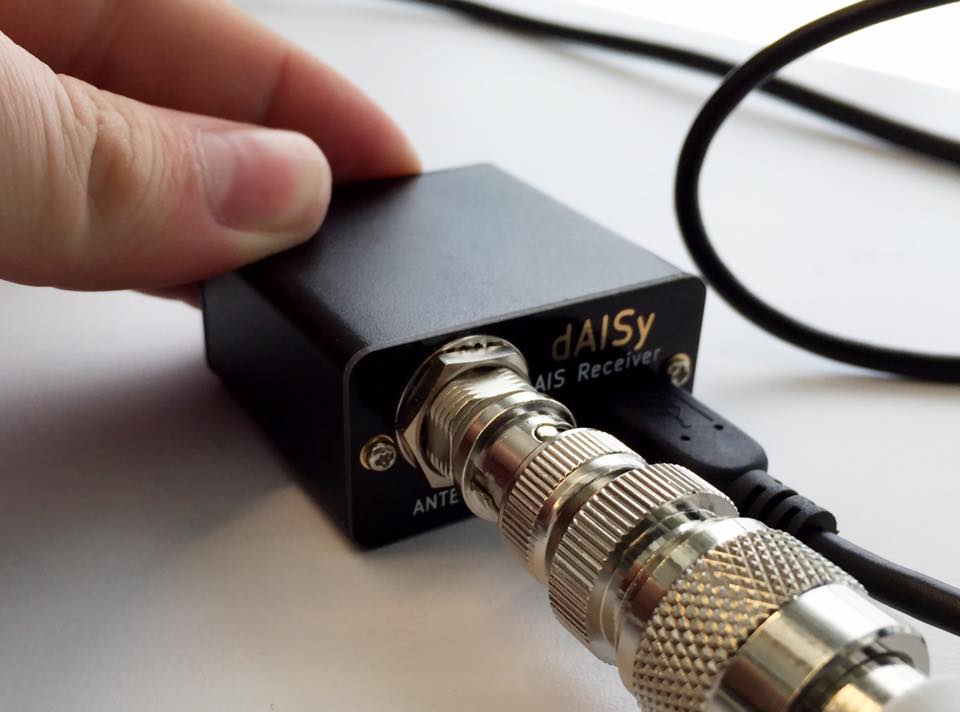
- Wegmatt LLC's original dAISy AIS Receiver ($59 on Tindie) or the newer two channel model, the Daisy 2+ ($89 on Tindie).
- Kenmax VHF "rubber duck" antenna ($13 on Amazon) -- depending on where you are located, you may want to invest in something bigger! I ended up using a 3' TRAM 1600-HC because my receiver is surrounded by large buildings in Boston, MA.
- Canakit's 2.5A/5V micro USB power supply ($9 at Amazon)
Setting up your receiver
Getting your Raspberry Pi 3 running
First, we need to get the basics out of the way: setting up an operating system on the Raspberry Pi, getting it online, then updating it with the most recent software.
- Head over to the Raspberry Pi Foundation's site and download the latest version of the New Out-of-Box Setup (NOOBS).
- Unzip the NOOBS.zip file and put everything inside of it on to your micro SD card. Don't just put the ZIP file on the card; it won't work!
- Put the micro SD card in to your Raspberry Pi, connect a display, mouse, and keyboard, then plug in the power.
- When the NOOBS setup loads, select Raspbian from the list and install it.
- Once the desktop loads after the installation is finished, set up the Pi's built-in WiFi by clicking on the icon in the top-right of the screen, then picking your WiFi network.
- Next, open the Terminal app and run
sudo apt-get update, thensudo apt-get upgradeto update your Pi with the latest software. If you're feeling bold, you can get the latest (bleeding edge) Raspberry Pi firmware by runningsudo rpi-updatetoo. - Install screen (this is how we're going to check to see if our dAISy is working later) by running
sudo apt-get install screen
Testing your dAISy AIS receiver
Now we're going to make sure our dAISy is working properly.
- First, attach the antenna to your dAISy. dAISy uses a BNC plug for its antennas, so if you have an antenna that uses a different connector (like SO-239), you'll need an adapter.
- Plug the dAISy's USB cable in to the dAISy, then in to your Raspberry Pi.
- Open up the Terminal app again. We're going to pull up dAISy's settings to make sure it hears AIS messages coming in from ships near us.
- Type
screen /dev/ttyACM0, then press escape to get in to dAISy's menu. - Press D until you get a message saying debug messages are turned on, then press escape again. Now, we're watching what AIS signals dAISy is picking up. If things are working, you'll see good messages prefaced with !AIVDM and weak/low signal messages with things like error: invalid stuff bit. When you're finished, you can exit screen by pressing CTRL-A, then K.
If things aren't working...
- Try unplugging dAISy and plugging it back in
- Make sure that your Raspberry Pi user is part of the dialout group. You can add your user to said group by typing
sudo usermod -a -G dialout $USERin the Terminal. - You can also try repositioning your antenna -- VHF works best with line-of-sight, so if you're surrounded by buildings, you might need to put your antenna on the roof!
Getting a Marine Traffic station
Now that we have a Raspberry Pi collecting AIS messages, we need a place to send them to! You can use applications like OpenCPN to plot the data you're getting locally, but I think it's more interesting to send it to an aggregator. That way, you're contributing to a global network of stations. I've been using Marine Traffic, though there are a few others if you're interested in using another provider.
- First, you'll need to register for an account with Marine Traffic.
- Next, log in to your account and scroll down to the section called My Stations.
- Click add a new station and fill out the details as best you can.
- A few moments later, you'll get an email from Marine Traffic telling you your station URL and where you should send your AIS traffic stream to. This will usually be to 5.9.207.224 on a random port. Be careful -- if you don't send traffic to your new station within 72 hours of creating it, they'll delete it and you'll need to make a new one.
Setting up kplex to send data directly to Marine Traffic
Ok, now we just need to link everything together! We'll be using kplex to do this; it will listen to the messages coming from your dAISy and forward them along to the correct endpoint over at Marine Traffic.
- First, download the latest version of kplex on to your Raspberry Pi. You want the version for Raspbian (ending in armhf.deb). It's not available through apt-get, so we're going to install the package by hand.
- Pop open a terminal on your Pi and enter
dpkg -i ./kplex_VERSION_armhf.deb, replacing VERSION with whatever the latest version of kplex is. When I did this, it was 1.3.4-1. - kplex will install. We'll want it to start automatically when the Pi boots up, so let's set that up now by entering
sudo update-rc.d kplex defaultsin to the terminal. (This doesn’t work on Raspbian Jessie and higher because of the switch to systemd. I am working on an systemd service file that will do the same thing!) - Now we need to tell kplex where to look for our AIS data and where to send it. That's done using a configuration file at
/etc/kplex.conf. I like to use nano to do simple edits, so runsudo nano /etc/kplex.confin the terminal to open up the configuration file. - Set up your configuration file to look like this:
[serial]
filename=/dev/ttyACM0
baud=38400
direction=in
[tcp]
address=5.9.207.224
port=(whatever Marine Traffic sent you earlier)
persist=yes
direction=out
The serial section is all about reading data in from your dAISy, which kplex can see on /dev/ttyACM0. The TCP section is all about sending the messages your dAISy gets to your station on Marine Traffic. When you are finished, press CTRL-O to save the file, then CTRL-X to exit nano. Now, you can either reboot your Raspberry Pi to start kplex or type sudo service kplex start in to the terminal.
Wrapping up
At this point, you should have a working Raspberry Pi 3 and dAISY, your own Marine Traffic station, and kplex set up route all the AIS information properly. Check your station at Marine Traffic; you should see statistics appearing about ships seen and messages received. Congratulations!